
Can Thermofoil Cabinets Be Fixed and Painted? A Step by Step Guide to a Fresh New Finish

Thermofoil cabinets can look sleek for years, then one peeling corner or yellowed door can make the whole kitchen feel tired. The good news is that thermofoil cabinets can be fixed painted, but they need more preparation than wood or MDF cabinets with standard paint.
The smooth vinyl surface that makes thermofoil easy to wipe clean also makes paint less willing to stick. If the finish is intact and the cabinet doors are not warped or badly peeling, painting can be a practical way to refresh them. If the thermofoil is bubbling, lifting near heat, or separating across large areas, replacement or refacing may be the better call.
This guide explains what thermofoil is, when painting makes sense, what materials to use, and how to paint thermofoil cabinets step by step for a cleaner, longer-lasting finish.
What thermofoil cabinets are
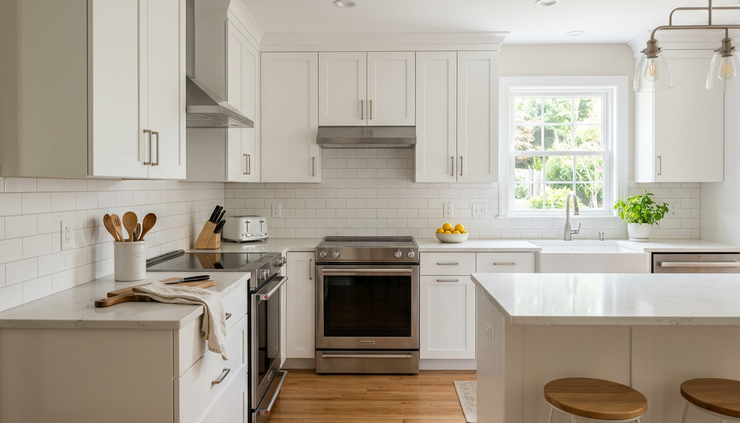
Thermofoil cabinets are usually made from medium-density fibreboard, often called MDF, covered with a thin layer of vinyl. The vinyl is heated and pressed onto the cabinet door or drawer front, creating a smooth, sealed surface.
Despite the name, thermofoil does not contain metal foil. It is a flexible plastic finish that bonds to the substrate through heat and pressure.
Thermofoil became popular because it offers a clean, consistent look at a lower cost than painted wood. It is common in kitchens, bathrooms, laundry rooms, and rental properties.
Common characteristics of thermofoil
Thermofoil has several traits that affect whether it can be painted well.
It has a very smooth finish
Most thermofoil cabinet doors have little to no texture. That makes them easy to clean, but it also gives primer fewer places to grip. Sanding and bonding primer are key.
It resists everyday moisture
The vinyl layer helps protect the MDF underneath from light splashes and general kitchen use. This is one reason thermofoil works well in many Canadian homes, especially in busy kitchens and bathrooms.
It can be sensitive to heat
Heat is a common weakness. Doors near ovens, kettles, toasters, dishwashers, and high-wattage under-cabinet lights can start to peel or bubble over time.
It has a factory-perfect look
Thermofoil often has a smooth, uniform colour with rounded edges. That clean factory finish is hard to copy perfectly with paint, but a careful paint job can still look fresh and attractive.
It cannot be repaired the same way wood can
Wood can be sanded, filled, stained, and refinished in many ways. Thermofoil is less forgiving. Once the vinyl starts lifting, the repair has limits.
When painting thermofoil cabinets makes sense
Painting is a good option when the cabinet boxes are sturdy and the thermofoil surface is mostly sound. If the doors are dated but still flat, firmly bonded, and structurally solid, repainting can extend their life.
Painting may make sense if:
The cabinet layout still works.
The doors are not badly warped.
Peeling is minor and limited to a few small edges.
The MDF underneath has not swollen.
The cabinet boxes are in good shape.
The budget does not allow for full replacement.
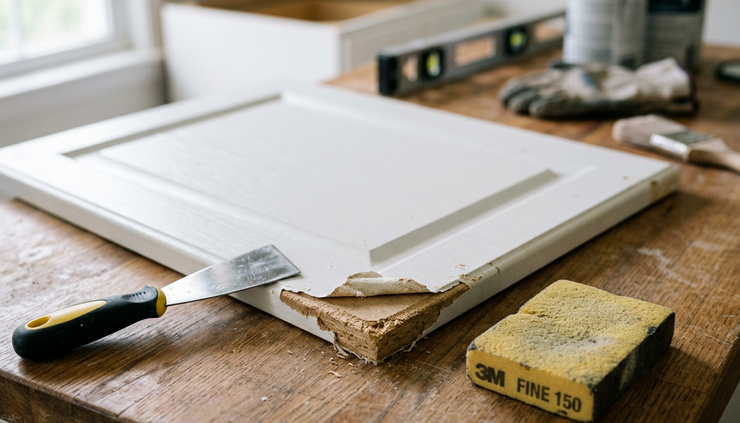
Painting is less likely to work well if the thermofoil is lifting across large sections. Paint cannot permanently glue down failing vinyl. It may hide the problem for a while, but peeling often returns.
A quick test helps. Press around the cabinet door edges, corners, and areas near appliances. If the vinyl feels loose, crunchy, bubbled, or hollow, the finish may already be failing.
Painting versus replacing thermofoil cabinets
The choice often comes down to condition, budget, time, and expectations. Painting costs less, but it takes careful prep and will not turn failing doors into new ones. Replacement costs more, but it can solve deeper problems.
Painting thermofoil cabinets
Costs less than replacement in most cases.
Lets you choose a new colour without changing the layout.
Works well when the doors are solid and the finish is intact.
Requires sanding, bonding primer, and patient curing time.
May chip or peel if the surface was not prepared well.
Replacing thermofoil cabinets
Costs more, especially if the boxes or layout change.
Gives you new doors, hardware, and often a more durable reset.
Makes sense when vinyl is lifting, MDF is swollen, or heat damage is widespread.
Can improve function if the existing kitchen layout is poor.
Takes more planning and may involve installation disruptions.
If the cabinet boxes are good but the doors are not, there is a middle option: replace only the doors and drawer fronts. This can be helpful when thermofoil fronts are peeling but the cabinet frames are still strong.
Materials and tools you will need
For best results, use products designed for slick surfaces and high-contact areas. Kitchen cabinets get touched every day, so wall paint alone is not enough.
Gather these materials before starting:
Screwdriver or drill
Painter’s tape
Drop sheets or kraft paper
Degreasing cleaner or TSP substitute
Clean microfibre cloths
Fine-grit sandpaper, usually 180 to 220 grit
Sanding sponge
Tack cloth or vacuum with brush attachment
High-adhesion bonding primer
Quality cabinet paint, acrylic enamel, alkyd enamel, or urethane-reinforced paint
Small foam rollers
High-quality angled brush
Paint tray
Wood filler or suitable patching compound, if needed
Utility knife
Small clamps, if repairing loose edges
Contact cement or suitable adhesive for minor thermofoil edge repair
Protective gloves and eye protection
Choose a primer labelled for hard-to-coat surfaces such as laminate, melamine, vinyl, or glossy finishes. The primer is the link between the slick thermofoil and the paint. Skipping it is one of the fastest ways to get peeling paint.
For paint, look for a cabinet-grade product that cures to a hard finish. A satin or semi-gloss sheen is popular because it wipes clean more easily than matte paint.
How to paint thermofoil cabinets step by step
Plan for several days from start to finish. The work itself is not complicated, but drying and curing time matter. Paint can feel dry to the touch long before it becomes durable.
1. Remove doors, drawers, and hardware
Take off cabinet doors and drawer fronts if possible. Remove hinges, knobs, pulls, and bumpers.
Label each door and drawer with painter’s tape so everything goes back in the same place. A simple numbering system works well. Put hardware in labelled bags to avoid hunting for screws later.
Set the doors on a stable work surface in a well-ventilated area. Sawhorses with boards across them work well.
2. Clean every surface thoroughly
Cabinets collect grease, cooking residue, hand oils, dust, and cleaning product film. Paint will not bond well over any of it.
Wash all surfaces with a degreasing cleaner or TSP substitute. Pay close attention to cabinet doors near the stove, sink, garbage pullout, and handles.
Rinse with clean water if the cleaner instructions call for it. Let everything dry fully before sanding.
3. Repair small peeling areas
Inspect the thermofoil carefully. If a small edge is lifting but the rest of the surface is sound, you can try to repair it.
Apply a thin layer of suitable adhesive under the lifted vinyl, press it flat, and clamp it until cured. Wipe away excess adhesive before it dries.
If the thermofoil has bubbled in the middle of a door or peeled across a large area, painting over it is risky. Loose vinyl will continue to move under the new finish.
4. Sand the surface lightly
The goal is to dull the glossy surface, not remove the thermofoil. Use 180 to 220 grit sandpaper or a fine sanding sponge.
Sand all front surfaces, edges, and profiles lightly and evenly. The surface should look less shiny when you finish.
Avoid aggressive sanding at corners. It is easy to cut through the vinyl and expose the MDF underneath. Exposed MDF can soak up moisture and primer unevenly.

5. Remove all sanding dust
Dust can ruin an otherwise careful paint job. Vacuum the doors, drawer fronts, and cabinet frames with a brush attachment. Wipe everything with a tack cloth or a slightly damp microfibre cloth.
Let the surfaces dry fully. Run your hand over the doors. They should feel smooth, clean, and slightly dull.
6. Tape and protect the work area
Use painter’s tape around cabinet boxes, walls, floors, appliances, and any areas that should not be painted. Cover countertops and floors with drop sheets.
If painting inside the kitchen, improve airflow. Open windows when weather allows and follow the product label for ventilation. In colder Canadian seasons, keep the room within the paint manufacturer’s recommended temperature range.
7. Apply bonding primer
Apply a thin, even coat of high-adhesion bonding primer. Use a brush for corners and profiles, then a foam roller for flat areas.
Do not overload the roller. Thick primer can leave texture, drips, or soft spots. Thin coats bond better and dry more evenly.
Let the primer dry according to the label. Some bonding primers need extra time before topcoating, especially on slick surfaces. Rushing this stage can weaken the finish.
After the primer dries, inspect the surface. If you see rough spots, nibs, or dust, sand very lightly with fine-grit sandpaper. Remove dust again before painting.
8. Paint the first coat
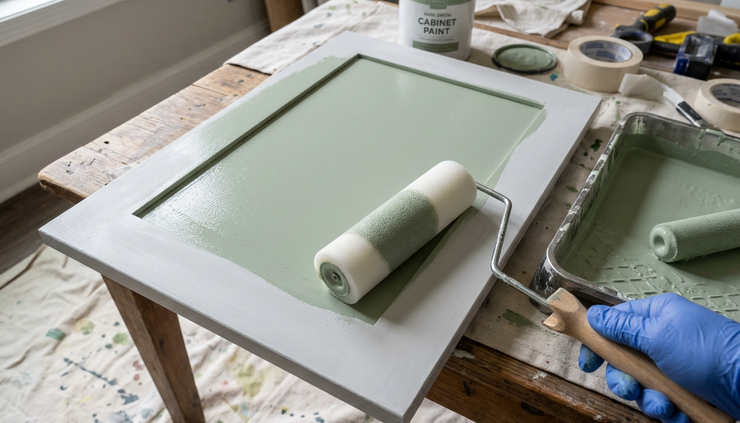
Apply the first coat of cabinet paint in thin, even layers. Brush detailed areas first, then roll the flat sections.
Work with the door laid flat if you can. This reduces runs and helps the finish level out. Paint the backs first, let them dry, then flip and paint the fronts.
Watch the edges. Paint can collect there and form ridges or drips. Smooth them right away.
9. Add a second coat
Most thermofoil cabinets need at least two coats of paint after primer. A second coat improves colour depth, coverage, and durability.
Let the first coat dry for the recommended time before recoating. If the paint label gives a recoat window, follow it closely.
For a smoother result, lightly sand between coats with very fine sandpaper once the paint is dry. Remove dust before applying the next coat.
10. Let the paint cure before reassembly
Dry paint and cured paint are not the same. Dry paint can be touched. Cured paint has hardened enough to handle regular use.
Cabinet paint may take several days to a few weeks to fully cure, depending on the product, humidity, and temperature. During that time, treat the cabinets gently.
Reinstall doors and hardware once the paint can handle light handling. Avoid slamming doors, scrubbing surfaces, or hanging damp towels on freshly painted cabinet fronts.
Tips for a smoother and longer-lasting finish
A few details can make the difference between a paint job that lasts and one that chips early.
Use thin coats
Thick paint takes longer to cure and is more likely to dent or peel.
Avoid painting over silicone
Paint will not stick well to silicone caulk. Remove it and replace it after painting if needed.
Choose quality tools
Cheap brushes shed bristles and low-quality rollers can leave heavy texture.
Let each layer dry properly
Cabinets are high-touch surfaces. Extra patience gives the finish a better chance.
Add bumpers after painting
Small clear cabinet bumpers help prevent painted doors from sticking to the frame.
Control heat sources
If a cabinet sits beside an oven or above a toaster, heat may still affect the thermofoil and the new paint.
Common mistakes to avoid
Painting thermofoil is less forgiving than painting bare wood. Avoid these common problems.
Skipping the cleaning stage
Even clean-looking cabinets can carry grease. Primer may bond to the grease instead of the cabinet, then peel later.
Sanding too aggressively
Rough sanding can damage the vinyl layer. Once the MDF core is exposed, it becomes harder to get a smooth, sealed finish.
Using the wrong primer
A general-purpose drywall primer is not enough for thermofoil. Use a bonding primer made for slick or glossy surfaces.
Painting doors while they hang
It is possible, but harder to do well. Removing doors helps prevent runs, missed edges, and sticky contact points.
Reinstalling too soon
Fresh paint can dent, stick, or peel if handled too early. Give it as much curing time as the product allows.
How long painted thermofoil cabinets can last
A careful paint job on sound thermofoil can last for years with normal use. The result depends on surface condition, prep work, primer quality, paint choice, and daily wear.
Areas around handles, sinks, garbage pullouts, and appliances usually show wear first. Touch-ups may be needed over time.
Painted thermofoil will not be as tough as a factory-baked cabinet finish. It can still look very good when done properly, especially in kitchens where the cabinet doors are still in good physical condition.
For cleaning, use mild soap and a soft cloth. Avoid abrasive pads and harsh cleaners. Wipe spills quickly, especially near edges where moisture can creep under old thermofoil.
What a successful painted finish should look like
A good painted thermofoil finish should feel smooth, clean, and firmly bonded. The surface should not feel tacky after curing. Edges should be sealed, and doors should open without sticking to the frames.
Do not expect a factory finish unless you use professional spraying equipment and controlled conditions. A brush and roller finish can still look polished if the prep is careful and the coats are thin.
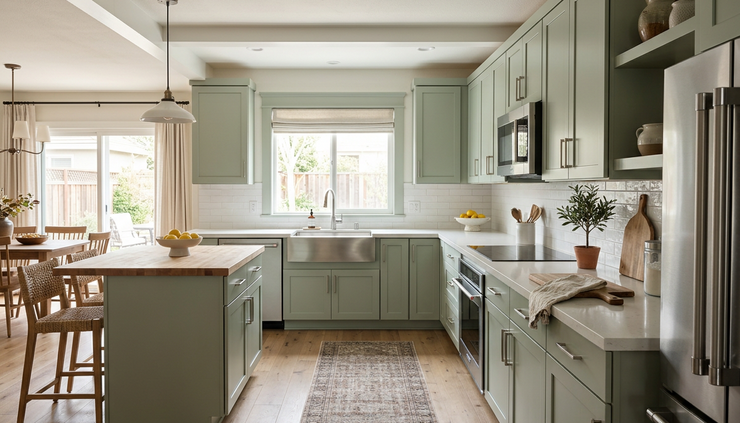
The best results usually come from choosing a forgiving colour. Mid-tone colours, soft whites, warm greys, muted greens, and gentle blues tend to hide small imperfections better than very dark or ultra-glossy finishes.
The final verdict on painting thermofoil cabinets
Yes, thermofoil cabinets can be painted, as long as the surface is stable, clean, and properly prepared. The key steps are simple but non-negotiable: clean thoroughly, repair small peeling areas, sand lightly, prime with a bonding primer, paint with a cabinet-grade product, and allow enough curing time.
Painting is a smart choice when the cabinets are structurally sound and the goal is a fresh look at a lower cost. Replacing is the better choice when peeling, swelling, or heat damage is widespread.
Start by inspecting one door closely. If the thermofoil is still firmly bonded, a careful paint job can turn dated cabinets into a feature you enjoy seeing every day.
Ready to give your home a fresh look?
For a quote on Thermofoil kitchen cabinet refinishing, Axcell Painting helps Ottawa homeowners get a finish they’ll love. With over 25 years of experience, we stand behind our work. You pay only when the job is complete and you’re 100% satisfied.


Comments